

C U S T O M S T E R E O V I B E 0 0 1
The Custom Stereo Vibe 001 is very similar to last years Deluxe Stereo Vibe 001 but without a seperate expression pedal, so those functions are moved to the main enclosure.

 |
| Lower board with the power, LFO and relay circuits. |
 |
| Connections between the solder-pins using silver-plated copper wire on the underside of the board. |
 |
| CL904N's |
I got hold of a few parts cabinets full of vintage parts, and one drawer where filled to the brim with hermetically sealed, gold-plated photocells. They where CL904N's and CL903L's
There where also a lot of gold plated metal can IC's (among them the LM308) which may end up in future projects.
 |
| Measuring and selecting the CL903L's for the Stereo Vibes. |
and paired them up in quartets for use in the Stereo Vibes.
 |
| Audio-board with the photocells and lamp in place. |
As I also did in my previous Vibes I replaced all elco's apart from the power filter-caps with tantalum capacitors and panasonic SFM caps in the audio-path. Transistors are 2SC828's and BC107C's
I used Styroflex capacitors for the 330pF, 470pF and 0.0047uF. For 0.015uF I used a panasonic film cap.
 |
| The reflective light-shield serves two purposes; to keep external light away from the photocells, and to reflect and distribute the light of the pulsing lamp evenly across all photocells. |
The 'mode' toggle-switch switches in momentary fashion between chorus/vibrato but when toggled upwards it latches and sets bypass in 'always on' state while changing the footswitch in a chorus/vibrato switch.
The Miyama footswitches have a nice confirming click to them, but much more quiet and easier to press than the latching 3PDT's. They also seem very sturdy and will probably outlive the filter-caps.
 |
| Toggle-switches for chorus/vibrato, mono/stereo and high/low input impedance. The yellow LED indicates chorus mode. |
 |
| Fully assembled with the light-shield in place. |
It's not tuned to sound extreme, but rather subtle and organic, and thanks to the pre-amp gain trimpot it goes quite far above unity volume.
In stereo the chorus-mode becomes more subtle with a less pronounced sweep, which is actually great for rotary-speaker type sounds
This perceived loss in intensity is caused by the two opposite phases creating phase cancellations in the room where the amplifiers are set. When you would turn of the 2nd amp you will notice the sweep is actually just as pronounced as it was in mono. When in stereo if you use the 'cancel' bypass you will hear the sound center around the main amp, and coming back from 'cancel' you hear the 2nd amp coming back in, and the effect starts panning between amps.
Here are two demo's I made. The 1st video is a little boring but goes through all the functions, while the 2nd starts of with some overdriven chorus sounds, then clean chords going through the full depth and speed ranges. It ends with 'Have you ever been..' with the effect set for slow Vibra-Tone type rotary sounds and after that some bluesy fast Vibra-Tone sounds.
C U S T O M S T E R E O V I B E 0 0 2

This one uses the exact same circuit as the Custom Stereo Vibe 001 so most details are covered above, but it is build inside a wah enclosure similar to last years Vintage Vibe Mono 001,... only this one is stereo! This time no impedance switch or volume knob, it's preset at unity gain and classic low input impedance.
The customer had very specific ideas about the looks he wanted for the pedal. He wanted it baby blue with chrome treadle like my prototype Liquivibe Stereo, and a creme rubber mat. He also wanted the chorus/vibrato switch as a pushbutton on the side like the Dunlop Roto-Vibe has.
 |
| prototype Liquivibe Stereo 001, Oktober 2012 |
Aesthetics and design choices
I always found the aesthetics of the pedals matter as much as the quality and sound, or rather, that the looks should reflect the qualities that are hidden inside the enclosure. I studied painting and drawing at the Minerva Academie in Groningen, The Netherlands, and my interests towards color, contrast and composition where always bigger than wanting the work to have a message.
(some of these pictures won't enlarge by clicking them, but download an unreadable .txt file. I will fix this when I found the cause.)
.jpg)


.jpg&container=blogger&gadget=a&rewriteMime=image%2F*)


.jpg)
Most guitarists (including myself) are pretty conservative on how gear has to look. The Stratocaster was designed in 1954 and the design of it remained pretty much unchanged, even after 60 years. I do love modern art and some modern design and architecture, but I also think modern design in for example cars, amplifiers and guitars often lacks the beauty that the classics from the 50's, 60's and 70's have.
Because I prefer not to work with unhealthy fumes and acids I chose metal letter stamps for the lettering on bare aluminium enclosures. These stamps have been used a lot on industrial machines and such, and I think it gives the pedals a nice classic-industrial look that tells it's a no-nonsense quality tool meant to be used, but by the irregularities from doing this by hand without a grid it retains a handcrafted feel to it.

So far the only enclosures I have painted are wah-shells. My first Wah was a vox with chrome treadle, and I always loved how that contrasted with the colour of the main enclosure. For the colour I chose nitrocellusose lacquer meant for guitar finishing because they come in the correct colour-range used in classic cars and guitars and would have the same vintage shine to it after sanding and buffing.
In my paintings I always used Dioxazine Purple, Veridian Green, Zinc White and Cadmium Yellow to mix my blacks, blues, turquoises, greens, greys and whites, and this is reflected in the choice for Surf Green with creme knobs. In this Vibe the polished aluminium/letter stamp style and the painted enclosure style merged really well, and I like it so much I will have to dismiss my aversion towards spray-paints and take use this style with me in future products.
For inspiration I looked up pictures of old Fenders and classic cars (Fender used the same lacquer and colors as the automobile industry did at that time.)
 |
| Surf Green 1957 Chevrolet Bel Air. |
 |
| 1974 Citroen D-Special 02, photo by Joe Mabel. |
 |
| Daphne Blue 1958 Cadillac Deville. |
 |
| Surf Green Fender Custom Shop Stratocaster '60s relic. |
 |
| Surf Green fender Mustang. |
Painting and polishing
 |
 |
| A polished and unpolished treadle. |
I did some research about chroming, and it turned out it would cost me around 90 euro's to have it done, so I ditched that plan and tried polishing instead. I found a great aluminium polish (Belgom Alu) that works much better than the silver polish I used before. The treadle turned out very smooth and shiny and I can hardly tell it apart from a chrome Vox threadle, so I'm very happy about that.
The white rubber mat also looked a lot better than I expected. I thought it needed black as a strong contrast against the green and chrome, but the creme actually makes the green jump out more.
I'm still planning for a Wah pedal to be added to the Liquitone catalog, and I think I will use the same look but in Daphne Blue like the Citroen DS pictured above.
 |
| Orange Led between the knobs flashes with the speed of the effect and dims when in 'cancel' bypass. |
 |
| Red LED for bypass, yellow LED for chorus mode. |
I redesigned the layout to be able to fit the extra components needed for stereo operation and moved the lamp/photocell section to gain more clearance with the bottom plate.

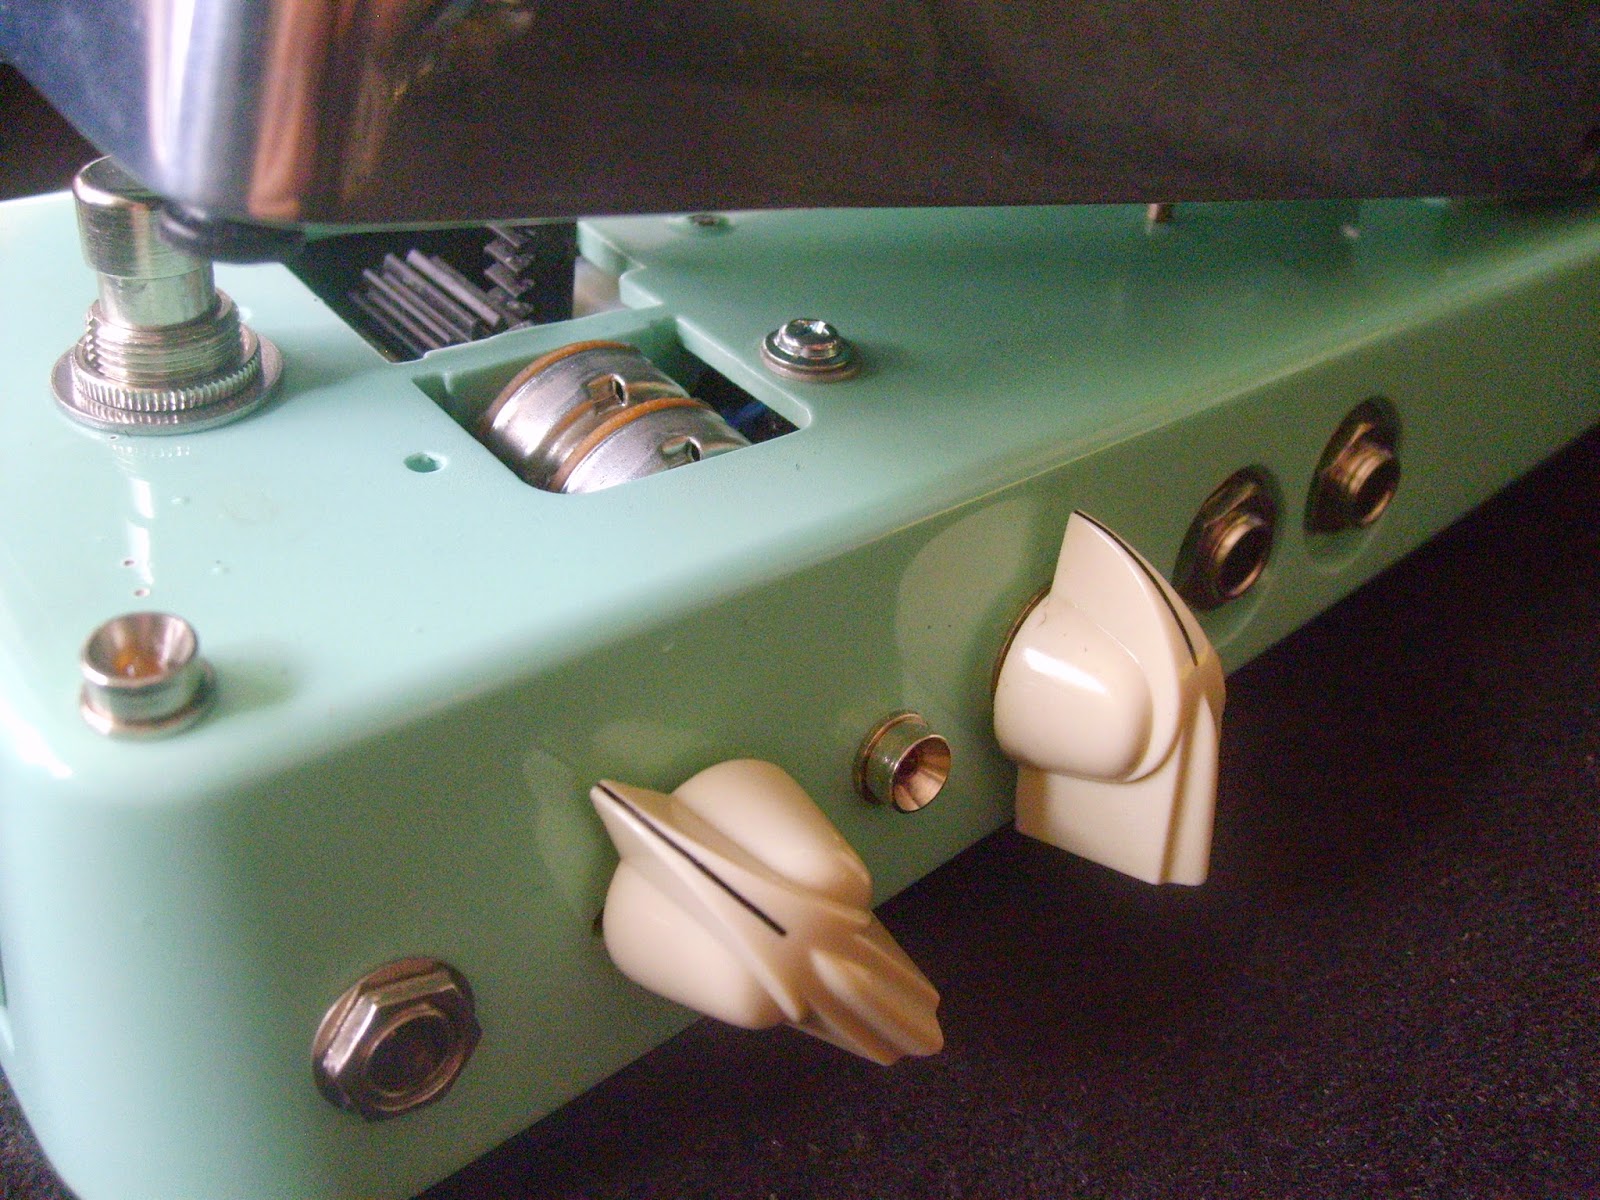
 |
| The relays sit right beside the effect input and outputs and the jacks, which the keeps the wiring very short, both when bypassed or when on. |
Here is a quick demo I made. There is a lot of noise caused by high record levels vs. low volume on the amps, and hum in the recording caused by the two amp setup with bad power conditions in the room. I chose not to filter this out during editing to keep the EQ as natuaral as possible.
Update June 17 2014; Due to a trademark issue with an similar product with the same name the next builds will carry a different name.
No comments:
Post a Comment